Lesson Plan Template
Organize teaching materials and assess student progress and interests.
About the Lesson Plan template
Teachers can use the lesson plan template as a tool to facilitate their learning sessions, to get more clarity when planning lessons, inform everyone about assignments and align expectations. The template also makes it easy to assess the learning experience, ensure the content was well-received, and check if the lession was effective.
What is a lesson plan template?
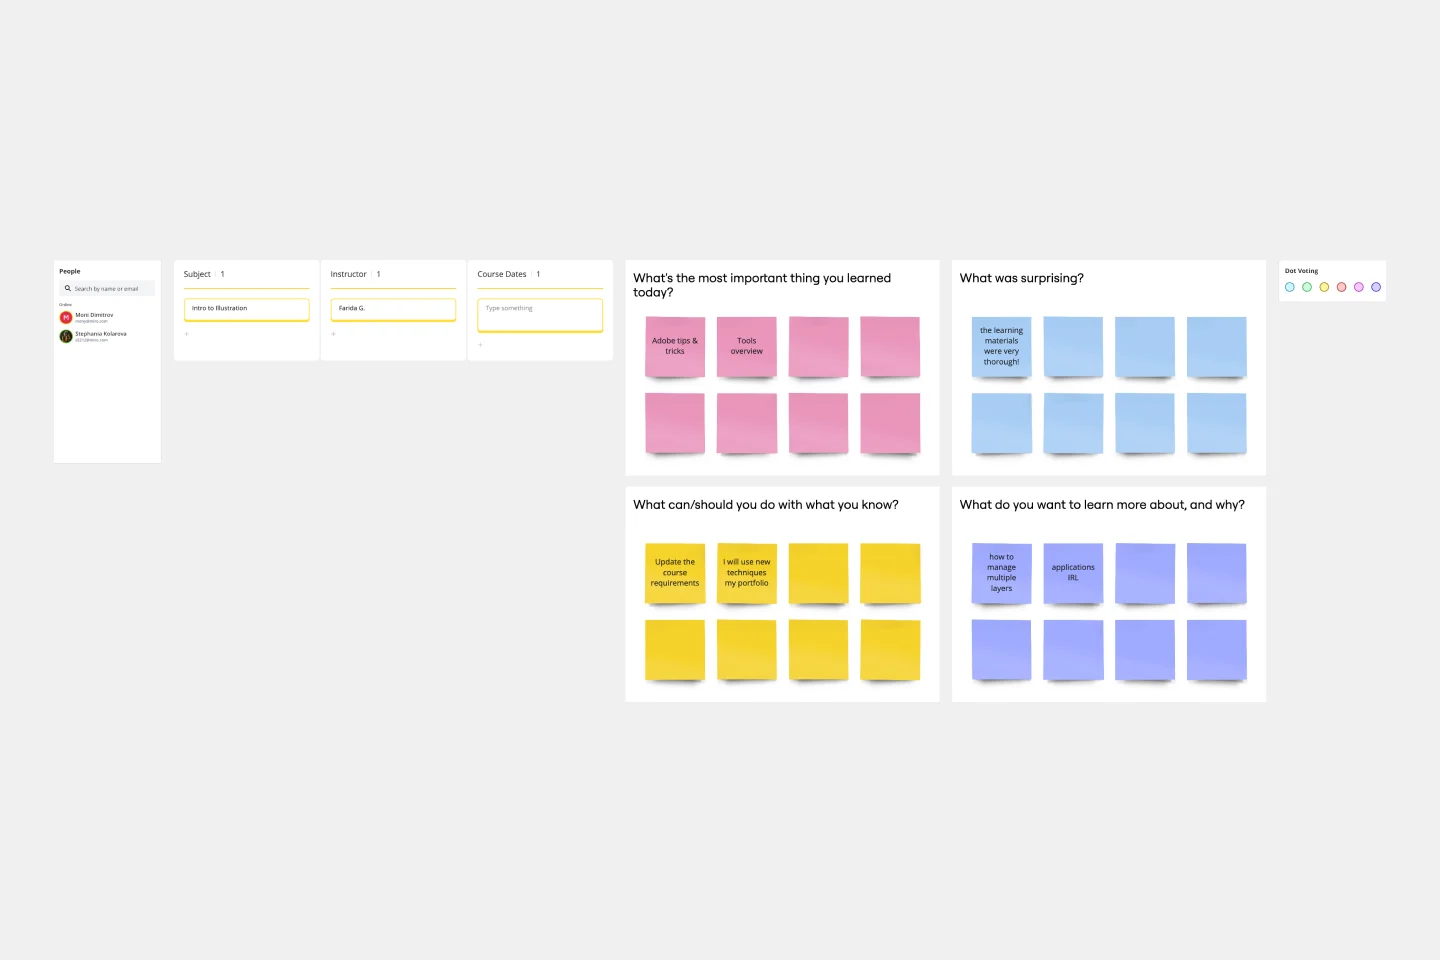
A lesson plan template is a detailed description of the learning trajectory or the lesson. It consists of five parts: lesson plan, a summary of tasks, assignment, feedback, and further reading.
These are the key areas teachers often work on with the help of the lesson plan, but details can vary depending on the teacher’s preference or institution. When well developed, the lesson plan reflects the students’ interests and needs, and it’s widely adopted as a best practice in the educational field.
It’s essential to view the lesson plan as a thinking process, not only a template. The lesson plan is envisioned to be a blueprint, a guide map for teaching-learning activities. Teachers should keep it flexible but also follow it systematically as they develop teaching concepts.
When to use a lesson plan template
You can use the lesson plan template at the beginning of the lesson. You can also consider a sequence to the lesson plan to follow up consistently with your teaching plan, and allow students to recall what they have learned and connect to what’s coming next.
How to use the lesson plan template in Miro
You can easily make your lesson plan with Miro’s template. Our collaborative platform is the perfect canvas to create and share with your students.
Get started by selecting the lesson plan template, then take the following steps to make one of your own:
Lesson plan: add here the basic information about your lesson plan, such as topic, date, and learning goals.
Summary of tasks: outline your lesson plan and briefly describe your students’ tasks.
Assignment: this section is where you can describe in detail the lesson assignment and explain to your students what they will do.
Feedback: leave this field for your students to fill, and later on, when analyzing it, you can cluster the topics and identify interests, improvements, and successes.
Further reading: in this section, you can freely suggest additional readings, interesting resources and even add other links and images related to your lesson, be creative!
How do you write a lesson plan?
Write your lesson plan with clear instructional language as it will be a guide map to your lesson. Please make sure the learning goals are clear and your students understand their assignments. Keep it informal and use a friendly tone of voice to give space for your students to feel more comfortable and at ease when following your lesson plan.
What are the 5 parts of the lesson plan?
The lesson plan template has five parts: Lesson plan with basic information about the topic Summary of tasks Assignment details Feedback Further readings
Get started with this template right now.
Advanced Project Gantt Chart Template
Works best for:
Gantt Chart, Planning
Manage complex projects with ease using the Advance Project Gantt Chart Template. This tool helps you schedule tasks, set deadlines, and track progress in a visual format. Ensure that all team members are aligned and that your project stays on track. Ideal for project managers handling multifaceted projects with multiple dependencies and timelines.
Multiple-Product Roadmap
Works best for:
Planning, Mapping
The Multiple Product Roadmap template empowers product managers to visualize and manage multiple product initiatives effectively. By providing a centralized view of project timelines, dependencies, and milestones, this template fosters alignment and transparency across teams. With sections for prioritizing initiatives, tracking progress, and communicating updates, it enables teams to coordinate efforts and drive collective success. This template serves as a strategic tool for planning and executing product roadmaps that align with organizational goals and drive business growth.
Hiring Process Timeline
Works best for:
Timeline, Planning
Streamline your recruitment process with the Hiring Process Timeline by Rizwan Khawaja. This template helps you organize every step of hiring, from job advertisement to final onboarding. Visualize timelines, track candidates, and ensure an efficient hiring workflow. Perfect for HR professionals aiming to improve their recruitment strategy and reduce time-to-hire.
Fishbone Diagram for Manufacturing
Works best for:
Fishbone diagram
In manufacturing, pinpointing the root causes of defects and inefficiencies is crucial. The Fishbone Diagram for Manufacturing template helps you systematically investigate issues related to production. Categorize potential causes into areas such as machinery, methods, materials, and manpower. This structured approach enables your team to collaboratively identify and address underlying problems, improving processes and enhancing manufacturing quality.
Timeline Template
Works best for:
Project Management, Flowcharts, Project Planning
A timeline displays a chronological order of important dates, and scheduled events. Timelines help product managers, project managers, and team members tell visual stories about progress and obstacles. Timelines enable teams to see at a glance what happened before, what progress is happening now, and what needs tackling in the future. Projects or products with specific purpose or deliverables should be based on a timeline to be successful. Use the timeline as a shared reference for start dates, end dates, and milestones.
Process Map Template
Works best for:
Agile Methodology, Product Management, Mapping
Process mapping allows you to assess, document, and strategize around any plan or approach your team has put in place. It’s a useful tool for eliminating or preventing blockers. Organized by stages, a process map enables your team to divide up a process or system and record deliverables and action items at each stage of the process. By breaking down the objectives, activities and deliverables at any stage of a project, you can gain insight into whether you are on track or effectively working through a problem.